 The required equipment for each race is listed on the specific race page:
The information here may be of interest to racers in either race. It is hoped this will answer many questions regarding specific equipment used by racers in each of the three divisions. If some of this is unclear or you have questions after reading this section, please email us at This email address is being protected from spambots. You need JavaScript enabled to view it..
To Sleigh or Not to Sleigh
General Discussion
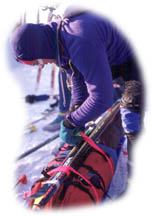 Undoubtedly because of the Iditarod, sleds have achieved mythical status in the Susitna 100. Skiers, runners, snowshoers, and even bikers have been captured in hundreds of photographs grunting and straining along the trail with a sled in tow.
Sleds are likely to remain a fixture with runners and snowshoers because when you're relying on foot-power, hauling 20 pounds (don't forget your water and extra food!) on your back over 100 miles of "punchy" snow is rarely going to be anyone's first choice (although it has been tried!).
However, sleds have disappeared from the bike race and currently are not favored by the more competitive skiers. Over the years, most skiers have pulled their gear behind them in sleds. Recently, as ski times have come down, more and more skiers are opting to carry their gear in backpacks. The current 100-mile course should make backpacks even more attractive.
Sleds offer the advantage of reducing the weight that you must support (as opposed to move). This is especially important if you plan to carry more than the required minimum amount of gear.
Sleds also allow you to carry more bulk than will fit into most backpacks, which could be important if you plan to use a synthetic sleeping bag instead of down bag.
Finally, sleds allow you to easily use a CamelBak-style water system because the harness doesn't prevent you from wearing a water bladder on your back.
Some Thoughts for Skiers
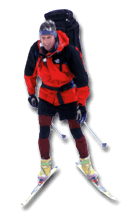 Backpacks add about 20 pounds to your effective body weight. This means you might want to select stiffer skis than you would normally use. You will also have to shorten the kick-wax zone on your classical skis and because you'll wear out the wax faster on all of your skis, stop to wax more often. Backpacks also change your center of gravity, which affects proper ski technique and makes downhills harder. And backpacks increase your upper-body fatigue, which inevitably affects your technique.
Sleds have more space than backpacks, which will tempt you to further increase your load by bringing along more gear than you really need. The drag between your sled's base and trail surface significantly adds to your load, especially in new or soft snow conditions. Sleds alter your ski technique by pulling on your hips. A sled never seems to go the same speed as you are moving when you pull it over the snowmobile-moguled Susitna 100 trail because it is 5-to-10 feet behind you, so it is going up one mogul face while you're going down another, or vice versa. This means your sled constantly pushes or pulls on you. And it pulls you down sidehills and makes turns and hills harder to negotiate.
You should try to test ski a variety of backpack and sled systems before deciding how to carry your gear in the race. And be sure to test them on Susitna 100-like trails because a system that works great on a groomed ski trail might be horrible on back-country snowmobile and dog sled trails. Remember that all backpacks and sleds are not created equally.
How to Build a Sled
Most sleds are made from kid's toboggans readily available in Anchorage stores. Typically the sleds come in two lengths (36-inch and 48-inch), both of which have been used by race winners. There are two ways to rig the sled for carrying gear:
The "flexible" tow-line, either a light cord or webbing, is easiest to rig, but also the most painful to use. Just remember that the sled is subject to the laws of gravity and will often act like a dog on a leash, sliding back and forth behind you on the trail, reminding you of its presence with periodic jerks that try to separate your vertebrae. If you insist on this method, do lots of exercises for the mid-section.
The rigid tow-line is typically made of 1/2-inch diameter plastic (technically CPVC) with a light "perlon" (static) or "bungee" (dynamic) cord run through the pipe. Some people attach the plastic pipes directly to the sled and waistbelt, using perlon as a "back-up" connection. Other racers use the bungee cord to transmit the forces that pull the sled and use the pipe as a rigid sleeve for the bungee cord. Both methods are satisfactory. Crossing the pipes in an "X" between you and the sled will give you better control of the load sliding along behind you. Another enhancement that is possible (but not required) is to fix dog sled runners to the bottom of the sled and reduce the friction with the icy trail.
 Undoubtedly because of the Iditarod, sleds have achieved mythical status in the Susitna 100. Skiers, runners, snowshoers, and even bikers have been captured in hundreds of photographs grunting and straining along the trail with a sled in tow.
Sleds are likely to remain a fixture with runners and snowshoers because when you're relying on foot-power, hauling 20 pounds (don't forget your water and extra food!) on your back over 100 miles of "punchy" snow is rarely going to be anyone's first choice (although it has been tried!).
However, sleds have disappeared from the bike race and currently are not favored by the more competitive skiers. Over the years, most skiers have pulled their gear behind them in sleds. Recently, as ski times have come down, more and more skiers are opting to carry their gear in backpacks. The current 100-mile course should make backpacks even more attractive.
Sleds offer the advantage of reducing the weight that you must support (as opposed to move). This is especially important if you plan to carry more than the required minimum amount of gear.
Sleds also allow you to carry more bulk than will fit into most backpacks, which could be important if you plan to use a synthetic sleeping bag instead of down bag.
Finally, sleds allow you to easily use a CamelBak-style water system because the harness doesn't prevent you from wearing a water bladder on your back.
Some Thoughts for Skiers
 Backpacks add about 20 pounds to your effective body weight. This means you might want to select stiffer skis than you would normally use. You will also have to shorten the kick-wax zone on your classical skis and because you'll wear out the wax faster on all of your skis, stop to wax more often. Backpacks also change your center of gravity, which affects proper ski technique and makes downhills harder. And backpacks increase your upper-body fatigue, which inevitably affects your technique.
Sleds have more space than backpacks, which will tempt you to further increase your load by bringing along more gear than you really need. The drag between your sled's base and trail surface significantly adds to your load, especially in new or soft snow conditions. Sleds alter your ski technique by pulling on your hips. A sled never seems to go the same speed as you are moving when you pull it over the snowmobile-moguled Susitna 100 trail because it is 5-to-10 feet behind you, so it is going up one mogul face while you're going down another, or vice versa. This means your sled constantly pushes or pulls on you. And it pulls you down sidehills and makes turns and hills harder to negotiate.
You should try to test ski a variety of backpack and sled systems before deciding how to carry your gear in the race. And be sure to test them on Susitna 100-like trails because a system that works great on a groomed ski trail might be horrible on back-country snowmobile and dog sled trails. Remember that all backpacks and sleds are not created equally.
How to Build a Sled
Most sleds are made from kid's toboggans readily available in Anchorage stores. Typically the sleds come in two lengths (36-inch and 48-inch), both of which have been used by race winners. There are two ways to rig the sled for carrying gear:
- Drill 8-10 holes along the perimeter of the sled and loop a light cord around the sled, in-and-out of the holes, creating a series of clip-in points. Tie 4 24-inch pieces of 1-inch webbing, 1 each half-way back from the front and half-way up from the rear of the sled on either side, opposite each other. Connect with fastex buckles. Clip in a lightweight nylon duffel bag, sized to fit the sled, with carabiners at the front and the rear. Once loaded, lash the bag down with the webbing.
- Another method, if you have time, is to make an oversized nylon cover for the sled (add a zipper down the middle) and use pop-rivets to permanently attach it to the sled. This approach will do a better job of keeping snow and ice out of your load.
The "flexible" tow-line, either a light cord or webbing, is easiest to rig, but also the most painful to use. Just remember that the sled is subject to the laws of gravity and will often act like a dog on a leash, sliding back and forth behind you on the trail, reminding you of its presence with periodic jerks that try to separate your vertebrae. If you insist on this method, do lots of exercises for the mid-section.
The rigid tow-line is typically made of 1/2-inch diameter plastic (technically CPVC) with a light "perlon" (static) or "bungee" (dynamic) cord run through the pipe. Some people attach the plastic pipes directly to the sled and waistbelt, using perlon as a "back-up" connection. Other racers use the bungee cord to transmit the forces that pull the sled and use the pipe as a rigid sleeve for the bungee cord. Both methods are satisfactory. Crossing the pipes in an "X" between you and the sled will give you better control of the load sliding along behind you. Another enhancement that is possible (but not required) is to fix dog sled runners to the bottom of the sled and reduce the friction with the icy trail.
Clothing
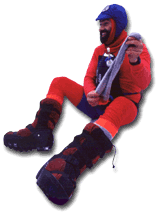 The most common mistake racers make is over-dressing. Remember: the tremendous energy output required for this race is exhausted by your body as waste heat and if it can not radiate (or convect) freely from your body, must be cooled by sweating. During most of the race you will operate as a portable space heater; you will be pleasantly surprised how warm you can stay just by moving. By contrast, those who choose to overdress will spend most of the race sweating, thus soaking their clothes, gaining "water" weight, and reducing their clothing's insulation value. You will likely end up much colder than you would have if you had dressed more lightly.
Your clothing selection must therefore focus on two objectives:
- providing a sufficient number of vents for your excess heat to pass from your body to the cooler temperatures around you before your body generates sweat to accomplish the same thing.
- blocking most (but not all) of the wind you encounter (either natural or created by your forward movement) from "sucking" away too much heat (and chilling you) or (worse yet) super-cooling your skin and underlying tissue, thus giving you frost-bite.
A lot of that water you'll be drinking will leave through your skin and will need to pass through your clothes. So, your outer layer on top and bottom should have a windproof front and breathable sides and rear (light pile or knitted fabrics work well). There are a lot of clothing products with this combination of wind-proof paneling on the front and polypro- or pile fabric on the arms and back on the market now.
Be advised that Goretex and other "breathable" waterproof materials become clogged with ice at below-freezing temperatures. As windproof front materials, these fabrics are acceptable. However, on the sides and back of your clothes they'll trap moisture and add a layer of ice to your clothing.
On the other hand, if it is 20- or 30-below zero, overheating is the least of your worries. In these situations, get your entire body covered in a good shell.
Layer various weights of polypro, capilene, drilete or thermax under your outer, breathable/windproof clothes. Multiple light layers with neck zippers let you adjust your ventilation as you travel. No matter what your outer layer, you'll saturate your clothes in a few hours. Wear the lightest clothes that will keep you comfortable, with a wicking layer like Capilene or Drilete next to your skin. Windproof jocks are much appreciated by men. In an emergency, stuff a mitten or hat next to your crotch.
Carry headband, hat and facemask and try them in different combinations. Neck gaitors and balaclavas are variations on the theme you may find useful. Your face, head and neck will need different amounts of protection as conditions vary. Uncovering your head is usually the simplest way to dump heat. If you're traveling into a strong headwind you'll find eye protection very helpful, especially if snow is falling.
Heat packs are small envelopes filled with powdered iron and oxidizers. They can warm hands, feet or water bottles for hours. Some people use them as part of their standard winter set-up, others carry them for emergencies. Grabber and MyCoal are two widely sold brands. Disposable heat packs are preferred because the reusable types are heavy and bulky and less effective. For foot warming, place the pads on the ball of your foot with only a thin pair of stockings between the pad and your skin. For extra warmth, place a second pad on the top of your toes. The chemicals generate warmth for at least four hours.
Once again, do not be fooled by temperatures at the starting line; if you feel warm as you start out then you're probably overdressed.
Strictly for Bikes
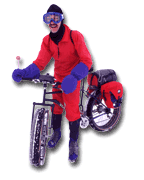 More than the other divisions, equipment knowledge and innovation is a key ingredient for competitive success in the bike division. The information presented here is provided for the purpose of minimizing failure. For a competitive edge, the bike racers will have to depend on their own knowledge and innovation.
Clothing
Most cold-related injuries affect the feet, and bikers are probably more vulnerable than other types of racers in the Susitna 100. The most important rule: be proactive; do not wait for your feet to get cold. By the time the pain becomes too unbearable to continue you have probably done some damage and will lose a lot of time (and maybe some toes) getting ready to move again.
A suggested foot-protection system:
- Liner sock. The thinner the better; these socks don't add much insulating value, but they feel a whole lot better than the next layer.
- Neoprene sock. They're waterproof, windproof, and durable. Be careful that the fit is not too snug and cuts off the fresh, warm blood that will keep your feet warm.
- Expedition-weight polypropylene sock.
- You want your shoe to provide at least some water and wind resistance and maybe a bit of insulation. You will need to oversize a couple of sizes to accommodate items 1-3 above; since you will end up with a lot of dead space in the toe box, stuff in some good insulating material to give your toes something nice to press into.
- Neos over-boot. Your final piece of armor should be a good neoprene overboot. This layer will be your primary defense against wind, snow, ice, water, and anything else that will come up off the trail onto your feet. The insulated overboots used by nordic skiers also merit consideration as a substitute.
Most of the competitive riders use a cleat system. The major issue with cleats is icing, especially if you go inside a warm checkpoint, raise the cleats to room temperature, and then walk outside. Keep a knife handy for chipping them clear.
Your hands are another area that quickly feel winter's bite. Again, everyone will have a unique system that works and pre-race experimentation is strongly recommended. Have 2-3 different weight gloves with you to wear under your pogies.
Bike pogies are oversized mittens that fit over the handlebars. They let you ride barehanded when you'd wear gloves and let you wear gloves when you would need heavy mittens. This improves your control of the bike and makes eating, drinking, clothes adjusting and nose wiping easier.
Below zero, cycling speeds generate enough wind chill to freeze exposed skin quickly. If parts of your face feel cold or numb, stop and warm them before they get frostbitten. If you're riding with others, watch each others' faces for white spots. Be careful with glasses, watches, jewelry and zipper pulls. Small metal and plastic objects can get cold enough to cause frostbite. Carry an extra clothes layer, about 20 degrees worth; windshells, an insulated jacket, something to keep you warmer if you have to walk for a while.
Equipment
It is all about tire width. On rare occasions, the trail has been sufficiently firm that 2.2 (56mm) tires provided enough flotation. Usually though, more width equals more riding, less pushing. Fat tire bikes are now available for sale and for rent. These bikes have carbon, aluminum or steel frames and 4-5" rims and tires. Trail conditions are hard to predict and change rapidly, so the fat tire bike is now the equipment of choice.
At a minimum the following measures are recommended:
Studded tires usually offer no advantage. If the trail conditions favor studded tires (i.e. it is icy), the trail will be firm enough for 2.2 studded tires on a 45mm rim (or maybe even a 26mm rim.) Be advised that trail firmness is not uniform throughout the course and may change during the race. Even with icy conditions, the fat bikes perform well without studded tires.
Check out these links:
- http://fatbackbikes.com
- http://www.fatbikes.com
- http://www.arcticcycles.com
- http://backcountrybikeandski.com
Load up your bike with all your equipment and test thoroughly on snowmobile trails before the event. Testing your loaded bike on groomed multi-use trails will give you a false sense of adequacy. There is no adequate substitute for training on the Susitna Valley snowmobile trails.
- Glue your tires to your rims with tubular tire glue or 3M Fast Tak all the way around one side. The unglued side is for fixing flats. The most common bike problems we see in the Susitna 100 are flats due to tire creep, racks and panniers damaged by rough trails and crashes, and broken chains.
- Recommended tire pressure varies with conditions. You'll have to experiment. It's usually better to take the time to make pressure changes as soon as you think they're needed, rather than wasting energy fighting the bike on tires that are too hard or too soft. Beginning snow riders almost always run their tires too hard. As the snow gets softer, so should your tires. "When in doubt, let air out." Mini pumps have improved to the point that they offer performance similar to that of frame pumps. You can keep them warm inside your jacket so they work better in the cold. Presta valves are less prone to freezing up and easier to let air out of than Schrader valves. If your rims are drilled for Schrader valves, you can use either type of tube in an emergency.
- Cover your tools with tape so you don't have to touch cold metal directly when doing emergency repairs. Few mechanical things work well when it gets very cold (say minus 30 degrees (F) or colder). Even a well prepared bicycle is not at its best then. Plastics do get brittle and we see water bottle cages, toeclips, pedals and the sheathing on cable housing break in winter.
Strictly for Foot
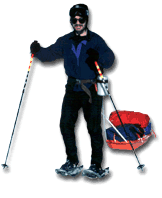 Clothing:
- Head: Windblock headband, backed-up with a polypro hat, polypro balaclava, a nylon/fleece "bomber" hat, and a neoprene face-mask.
- Upper Torso: Short-sleeve lightweight polypro t-shirt, long-sleeve lightweight polypro t-neck and a single-layer goretex wind-shirt, backed-up with a down sweater and a 3-layer goretex rain jacket with hood.
- Hands: Thin polypro gloves and nylon over-mittens, backed up with pile mittens and 3-layer goretex over-mittens.
- Lower Torso: Polypro briefs with a nylon panel in the crotch and lycra tights, backed-up with polypro long-johns and nylon wind pants. Snowshoers should wear the nylon wind pants the entire race because of the snow that the snowshoe tails kick up on your butt, hamstrings, and Achilles' tendons.
- Feet: Polypro socks and running shoes, backed-up with neoprene socks. Snowshoers should wear lightweight gaiters. Usually, studded shoes offer no benefit.
- Head: Switch the headband to neoprene and the balaclava to heavier windblock material. Consider using both the headband and the balaclava right away.
- Upper Torso: Switch the long-sleeve polypro t-neck to a medium weight and add a pile jacket. Hands: Skip the gloves and bring a pair of lightweight and heavyweight mittens.
- Lower Torso: Skip the lycra tights and use a heavier "Koch-type" pant. Make sure your polypro long-johns will fit over these pants and that your nylon pants will fit over both of those.
- Feet: Add a pair of neoprene overboots as back-up gear
It's recommended that you race in your favorite running shoes, whether you are a runner or snowshoer. Just make sure the neoprene socks you will put on after the sun goes down will fit comfortably in the shoes. As long as you keep moving and (relatively) dry, your feet will never be cold.
Strictly for Skis
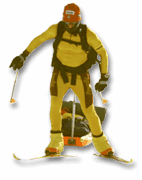 Clothing:
Skiers fall somewhere in between bikers and runner/snowshoers. You could be traveling as fast as the bikes (and thus vulnerable to wind chill) but you will also be mobilizing both your upper and lower body while skiing (and thus have blood pumping throughout your body). With constant motion at a low velocity your body will act like a runner/snowshoer's: lots of heat, lower wind chill. Skating at 8-10 miles per hour, you will still generate lots of heat, but will give up quite a bit cutting through the air. As with all the disciplines, one of your many tasks during the race is to be aware of your body heat (or lack thereof) and to make the necessary adjustments to minimize water loss due to sweat or (worse yet) lost time due to hypothermia.
Equipment:
You need to answer several important equipment questions before you get to the starting line. Should you use a sled or a backpack to carry your gear (see above discussion)? Do you want to use classical or skate skis? What about ski length and stiffness? And how should you wax your skis?
You're likely to encounter all sorts of conditions as you head down the Susitna 100 trail. Depending upon the weather, the trail is likely to have a mix of soft, powdery snow, glare-ice lakes and roads, hard-packed trails, and even snowless, dirt sections. There will probably be a lot of dirt and debris mixed into the snow along sections of snow machine trail, especially near steep hills and stream crossings. You'll have to deal with all sorts of ruts and rough spots left by bicycles, dog sleds, and snow machines. The trail width will vary from less than 4-feet to more than 80-feet wide. And air and snow temperatures can range from above freezing to minus 50 degrees Fahrenheit.
Given these mixed conditions, most skiers now use skate skis for the race. Sleds and backpacks don't seem to affect skaters as much as they do classical skiers. Skate ski glide wax works better in dirty and changing snow conditions than does classical ski kick wax. And skate skis are faster than classical skis over most of the trail conditions that you are likely to encounter.
Nevertheless, classical skis offer several important advantages over skate skis. They'll let you use your normal striding technique over narrow stretches of trail that will force skaters to double pole or marathon skate for miles at a time. Classical skis allow you to slow your pace to a shuffle, but still keep moving, when you get tired. It's hard to shuffle on skate skis, especially in difficult snow conditions. Classical skis work better than skate skis in very cold snow. And the extra length of classical skis will give you more floatation and will make the going easier in new or soft snow conditions. Consequently, you should seriously consider using classical skis if there is going to be a lot of new snow on the course, if it is supposed to be extremely cold, or if you plan to ski at a very slow pace.
Skate skiers should consider using shorter than standard racing-length skis. Shorter skis don't give as much floatation in soft snow, are harder to control over rough trails, and are generally slower than full-length skis. But they'll let you continue to skate over narrow trails that will force skiers on longer skis to double pole. And shorter skis tend to be more durable than longer skis and are easier to use on snow machine-moguled trails. They are also lighter and easier to use when you are feeling tired and uncoordinated. Accordingly, most skaters will do best to compromise and use mid-length skate skis in the 170-cm to 188-cm range.
The varied trail conditions along the Susitna 100 course make it difficult to predict whether softer or stiffer skis will be faster, so you'll probably do best on a medium-stiff ski for your body weight. Remember that your body weight effectively increases 20-some pounds if you are using a backpack to carry your gear. This extra weight will cause you to flatten your skis more than you normally would, which will affect their handling and will shorten the kick zone on your classical skis.
No single wax will work perfectly in all of the varied snow conditions that you are likely to encounter along the Susitna 100 trail. Your best bet is to select one super-durable wax job that will work in a variety of conditions. Depending upon the prevailing snow and weather conditions, you should probably glide wax with something like 4 layers of Start green, or Vauhti green fluor mixed with a couple of layers of graphite. Wax combinations like these are durable, will work reasonably well at most temperatures that you are likely to encounter, and will hold up well in dirty snow conditions.
Finally, you need to keep the poor trail conditions in mind when you select your ski equipment. You won't be on groomed trails and the remote course puts a lot more at stake than a short walk back to the car if you break a piece of gear. Consequently, keep durability and ease of repair in mind when you select your gear.
Don't start the race with either worn out or untested equipment.
Always carry simple repair parts and tools. Your repair kit should include duct tape, some repair sleeves and hose clamps for fixing broken ski poles or sled drawbars, spare screws for ski bindings and sled parts, and basic tools including a screwdriver and pliers.
